Category Archives: Comfort Foods

Fall Menu Ideas featuring Field Roast Stuffing

Fall has arrived in Seattle as though a curtain has dropped, ending the summer act and beginning the autumn intermission. The days are slow to start, and quick to end, with raindrops battering against windows as we all feverishly try to hold onto the glorious sunny days we’ve just left behind.

Seattle Skyline

Seattle in the Fall…what a beautiful place to be.

With this transition comes the inevitable shift in behavior. Days on the lake are replaced with afternoons spent reading on the couch, the soft snore of a puppy interrupting thoughts and inspiring a refill to a glass of wine or bowl of truffle popcorn. Evening BBQs and bonfires quickly turn into game nights, where a crackling fire provides the backdrop to the hoots and howls that come from confessions of Cards Against Humanity, or the poorly hummed tunes of Cranium.

Fall Menu Ideas

With a dinner this grand, appetizers can be modest.

Of course the blissful suppers of Capreses and Cava no longer seem quite right, but what replaces them is something while perhaps less glamorous, no less delicious. This Fall Sunday Supper, is relatively easy to put together and a perfect feast to begin or end your weekend. The Field Roast stuffing is the dark horse, making a table even sans Turkey a worthy destination.

What are your favorite Fall traditions?

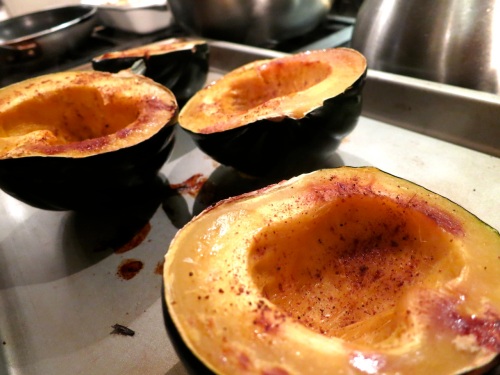
Fall Menu Ideas: Roasted Acorn Squash with Nutmeg and Cinnamon

Fall Sunday Supper

  • Olives, Hummus topped with Chili Sauce, Crackers, and Cheese
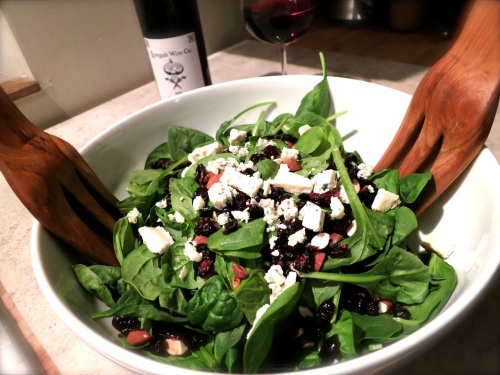
  • Spinach Salad with Toasted Almonds, Blue Cheese, Dried Cranberries in a Anchovy Infused Balsamic Dressing
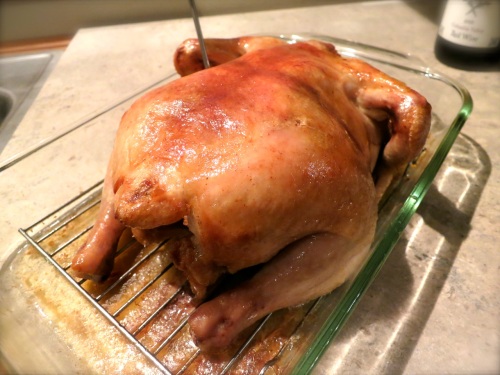
  • Roast Chicken
  • Field Roast Stuffing
  • Roasted Acorn Squash with Cinnamon and Nutmeg
  • Malarkey’s Best Garlic Mashed Potatoes

Field Roast Stuffing

Fall Menu Ideas: Field Roast Stuffing

With this hearty yet sophisticated Field Roast Stuffing you don’t even need a Roast Chicken or Turkey

  • 5 cups stale bread, cubed
  • 1 shallot, thinly sliced
  • 4 Field Roast links, diced
  • 4 TB Butter
  • 1 tsp dried thyme
  • 1 tsp dried basil
  • 1 tsp dried oregano
  • Salt and Pepper
  • 1 cup vegetable or chicken broth
  1. In a 400 degree oven, toast the cubed bread on a cookie sheet until golden brown about 5 – 8 minutes.
  2. Meanwhile, saute the shallot and field roast in the butter until beginning to slightly brown, 5 – 8 minutes. Add seasonings and salt and pepper to taste.
  3. In a large bowl combine the bread with the shallot/field roast mix and stir well to combine.
  4. Slowly adding the broth a few tablespoons at a time, mix until slightly moistened. Pending on how stale your bread is this will take anywhere from 1/2 – 1 cup of broth.
  5. Add to a 9×9 glass baking dish and bake at 400 degrees until warmed through, about 20 minutes.

Fall Menu Ideas_RoastChickenFall Menu Ideas: Spinach Salad

20 Comments

Filed under Comfort Foods, Entertaining, Salads, Uncategorized, Vegetarian

Sinfully Delicious: Cheddar Bacon Burgers topped with Truffle Mushrooms

Perhaps it is my East Coast upbringing, but my conscience is peppered with my “Should” list.

  • I should floss more.
  • I should swear less.
  • I should call my Grandmother more.
  • I should drink less.

The list goes on and on, and let me tell you…it is f*cking exhausting (see…there goes bullet #2).

Also on the list is that I “should” take public transportation more, and furthering my commitment to being more eco-friendly, I “should” eat less meat.

At this moment you’re probably thinking this is going to be a recipe for kale muffins, or radish soup. Let me tell you…it is not.

This is a recipe for the most sinful, most delicious, and generally most awesome burger you “should” ever eat.

Our excellent assistant Lou, who is gaining 2 lbs a week, and cute as can be. After getting swatted away from the grill she resigned herself to nibbling on a stick from the plum tree. So hard to be a puppy.

Forget the idea of cooking a burger and then topping it with bacon and cheddar. Those more advanced might think they’re clever by making a little cave in the middle and hiding the naughty goodies there. I’m here to tell you there’s something better…Cheddar Bacon Burgers topped with Truffle Mushrooms.

You buy the best ground chuck you can afford, into it you mix the best bacon you can find, and furthermore you add the best cheese in town. This is then formed into dense little patties of pure ecstasy and grilled to utter perfection.

Feeling like I’m on the set of a Big Mac commercial or something.

No you “shouldn’t” eat these every night and you definitely “should” be nicer to your neighbors, but in the meantime, I highly encourage this. You’ll be glad I did.

Cheddar Bacon Burgers topped with Truffle Mushrooms
Serves 4

This is wildly rich, so resist the inclination to pair it with a big red and instead go with a sophisticated rose.

Are you feeling guilty imagining eating this? Don’t…you shouldn’t. You “should” just enjoy it.

1/2 lb bacon
2 cups sharp cheddar, cubed
1 lb ground sirloin chuck (you can ask your butcher to do it, or do it at home if you have a meat attachment for your KitchenAid)
4 shakes Worcestershire sauce
4 buns, toasted
2 cups cremini mushrooms, thinly sliced
2 TB truffle oil
Desired toppings (Mayo, mustard, ketchup, lettuce, tomato, onion, etc)

The beginnings of utter deliciousness.

  1. Preheat grill to high, and get grates as clean as possible.
  2. Partially cook the bacon, until fat is released and it turns pink. Coarsely chop and set aside.
  3. Meanwhile, over low heat saute the mushrooms in the truffle oil until liquid is released and evaporated and mushrooms are cooked through. Remove from heat.
  4. Mix the chuck, bacon, and cheddar until well combined and form into four patties. Give each a shake of worcestershire
  5. Add the burgers to your grill and cook for approximately 2-3 minutes per side, pending on thickness and desired doneness. Note: The bacon will make it look a bit pinker than it actually is, and the cheese will cause it to be a bit smokier and stickier than you’re used to. This is okay…it is worth it.
  6. Remove from grill, put on buns, add truffle mushrooms, and assorted toppings, and enjoy ignoring your “should” list for the evening.

17 Comments

Filed under 15-Minute-Meals, Comfort Foods, Uncategorized

Let’s Go Steady: Grilled Summer Vegetable Strata

You might have noticed some minor changes around here lately. Nothing too big of course, but hopefully some small upgrades that will make Shut Up & Cook tick up one more notch on your “Favorite Food Blogs” list. (Incidentally, thank you to all who participated in the giveaway for free tickets to the Best of Seattle Party. All of your blog suggestions and recipe wish lists were such fun to receive).

The biggest change is the addition of a Recipe Index. That’s right folks, a one-stop-shop, all-you-can-eat, everything goes list of each and every recipe I’ve done over the last few years.

Looking through it I feel a mixture of many emotions: Pride (Hot damn, I’ve done some cooking!), embarrassment (Where do I get some of my blog post title ideas?), sadness (Still miss dogs Lucky and Onca every day), and peace (The past years haven’t all been easy, but I truly believe I’m better for them).

If you make nothing else from this blog…make these cookies. I guarantee they will be the best you’ve ever had.

For those of you that are new readers, I invite you to take a scroll through the list. Hopefully you’ll find new recipes to fall in love with, or discover old favorites. I felt like I was meeting a dear friend looking through the list, remembering moments and events, and who I was in each. With that, a few of what I think are the best (thank GOODNESS my photos have gotten better…eeesh!):

What I was surprised to find wasn’t on there however, was Strata. This was most odd because I make it at least once a month, and it’s a go-to for a delicious make-ahead brunch food that always feeds and satisfies a crowd. For those of you not familiar with the magic that is a strata, it is essentially a savory bread pudding meets egg custard. Stale bread is diced over which an egg/milk/cream mixture is poured. Any other assortment of ingredients are then added, it sits over night, and you bake it in the morning, resulting in a delicious smelling, beautiful looking, amazing tasting, puffed delight.

Grilled Summer Vegetable Strata
Serves 8 – 10

A perfect way to begin a Sunday morning.

The beauty of a strata is that you can throw whatever in…here I did grilled summer vegetables as a means to tackle my CSA, but you can do an endless combination of ingredients; think artichoke hearts and goat cheese, mushrooms and chorizo, peppers and sausage…the list could go on, and on, and is limited only by your creativity, and your leftovers.

  • 5 large eggs
  • 1 1/2 cups milk, cream, half and half, whatever
  • 1/4 tsp kosher salt
  • 1/4 tsp black pepper
  • 4 cups stale bread, cubed
  • 1 zucchini, thinly sliced
  • 1 summer squash, thinly sliced
  • Glug olive oil
  • 1 bunch kale, washed, and coarsely chopped
  • 2 cups semihard cheese, shredded
  • 1 cup semisoft cheese, shredded
  1. In a large bowl, whisk together the eggs, milk, salt, and pepper. Fold in the bread and semihard cheese and set aside.
  2. Preheat a gas grill on high. Take the zucchini and squash slices and toss with olive oil. Over medium heat, using a grill pan if you have one, cook until softened and grill marks beginning to show and flavor slightly smoky. Remove from grill and coarsely chop.
  3. Grease a 9×13 inch glass baking dish.
  4. Pour in half the egg mixture. Top with half the zucchini and squash, half the kale, and half the semisoft cheese. Repeat with remaining egg mixture, vegetables, and cheese.
  5. Cover with foil and allow to soak in fridge overnight.
  6. Remove from fridge one hour before cooking and preheat oven to 325.
  7. Bake for 40 – 45 minutes without foil, rotating halfway through, and returning foil if top getting too brown. Bake until the top of the dish is very brown and the middle is springy. Let the strata cool for 10 minutes before serving.

13 Comments

Filed under Breakfasts, Cheap Eats, Comfort Foods, Entertaining, Make ahead, Uncategorized, Vegetarian

Woo Woo Wonderful: Creamy Cauliflower Mac & Cheese

Oddly Delicious: Creamy Cauliflower Mac & Cheese

As you’ve probably guessed by now, I’m not much of a “Woo-Woo” person. I don’t listen to Phish, I haven’t owned tye-die since 1991, I don’t believe in Dream Catchers or Fortune Tellers, and I generally find activities where you’re supposed to close your eyes and hold hands with your neighbor somewhat amusing, and very uncomfortable.

This translates itself in perfect form into the kitchen as I suspiciously flip through recipes exclaiming “Delicious Sprout Smoothies” or “Dairy Free Grilled Cheese”. If I can’t see something, and taste it, and touch it, and most importantly, make sense of it, I tend to be a bit of a skeptic. Okay…a really big, annoying skeptic.

So when my CSA box arrived boasting a Cauliflower Mac & Cheese I was immediately wary, quick to dub it as some vegetarian, hippy dish that would never be as good as the real thing. However, as I peered into my refrigerator and realized that I still had anxiety-producing amounts of vegetables left and no plan with how to tackle them I decided to hand myself over to the softer side, and give this a try.

It admittedly is not the same dish as a traditional Mac & Cheese made with a béchamel, lots of cheese, and heavy cream, but it is a lovely lighter version of the old standard, with a nice contrast between the creamy cauliflower puree, dark, leafy kale, and crispy panko bread crumbs. It also is delicious, I think maybe even better, microwaved the next day…go figure!

Enjoy this when you’re willing to put your cynic subconscious on the shelf for an evening, and see what emerges.

The treats, in order of when comments were made.

The judges preparing for their case.

GIVEAWAY WINNER: Thanks to all who entered to win tickets to the Best of Seattle Party! The honorable judges, Duke and Lou chose the winner out of a row of 11 treats. The first snarfed up was #8, Morgen Schuler of Morgen Schuler Photography. Congrats to Morgan…and lucky for us, now we know this year’s event will be shot in style!

Little Lou, a fair and unbiased judge.

Creamy Cauliflower Mac & Cheese
Adapted from Hand Farmed Organics – Week 5 CSA Box

2 1/2 cups vegetable or chicken stock

2 bay leaves

1 cauliflower, cored and cut into large pieces

16 ounces penne pasta

1/2 cup sharp cheddar, grated

1/4 cup plain, non-fat Greek yogurt (I like Chobani for cooking b/c it’s less sweet than most)

The secret ingredient…a spoonful of low-fat plain yogurt.

2 cups chopped kale

1/2 cup sliced squash

Erina vs. The Veggies…my ongoing summer battle.

2 TB olive oil

1 TB Dijon mustard

1/8 tsp nutmeg

Salt and Pepper

1/4 cup grated parmesan

1/2 cup panko bread crumbs

  1. Heat oven to 400 degrees and grease a large glass baking dish
  2. Boil a pot of salted water.
  3. In a saucepan, warm stock and bay leaves on medium-low heat for five minutes; turn off heat
  4. Cook cauliflower in boiling water for 25 minutes or until very tender. Drain out all water, and add to cauliflower the stock (discard bay leaves), cheese, yogurt, oil, mustard, nutmeg, salt and pepper. Using an immersion blender, puree until totally smooth.
  5. Meanwhile, boil a second pot of water and cook the pasta, 3 minutes less than instructions. Drain and rinse with cool water.
  6. Add the pasta to the cauliflower puree and mix well.
  7. Pour half the pasta into the prepared dish. Top with half the kale and squash. Pour the remaining in and add the kale and squash. Top with parmesan and panko bread crumbs.
  8. Bake 20 minutes or until breadcrumbs are turning golden brown.
  9. Allow to sit 5-10 minutes before serving.

13 Comments

Filed under Cheap Eats, Comfort Foods, Health Conscious, Make ahead, Pasta, Vegetarian

Like It Was Yesterday: Dungeness Crab Dip with Grilled Braided Bread Sticks

I have a terrible memory. Fascinatingly bad really, for someone so organized and obsessively high functioning. And I’m not even saying this so you’ll exclaim, “No you don’t, Erina, you have an amazing memory! It’s like the best memory of anyone I know,” like I used to do when I was a teenager and would feign wishing I had bigger lips so people would exclaim “You wouldn’t want bigger lips! Your lips are perfect…and super big! You practically look like Angelina Jolie!”

No, the truth is my memory is shit. Not for the day-to-day mind you, I am capable of keeping 50 projects running simultaneously at work, remembering the most minute detail about each, but for major life events like my 8th grade graduation. Or some bunny we apparently had growing up. Or my uncle’s wedding.

So I find it strange, though maybe I shouldn’t,  that I have an impeccable memory when it comes to food. I remember with aching clarity the first time I had Saag Paneer, while visiting my friend Madeline in Toronto. Each little bite of cheese a seemingly glorious, hidden prize, and each piece of spinach scooped and scraped up until there was nothing left. I remember getting lost in Florence and unknowingly stumbling upon a famous pizzeria that slung the most perfect slices for 1 Euro a piece, and were sold out and shut down by noon each day. I remember the first time I tasted Sweet Breads in a little NYC restaurant, the savory, smooth, rich flavor dancing across my tongue as I quickly did the math in my head that if I skipped the taxi back to my hotel I could maybe order another plate. Simply put, I remember food, the way my brother Ben remembers everything else. With excruciating detail, and a general state of shock that others don’t remember it exactly the same way.

This, in case you’ve never seen one, is a Flying Squirrel.

A few months back we had dinner at one of our local pizza joints, Flying Squirrel. The pie’s were yummy, as always, and the Caesar salad an expected ringer. What blew me away though, what I ate much more than my share of, what I thought about for weeks afterward was their Dungeness Crab Dip served with Pizza Dough Bread Sticks.

It was rich. It was sinful. It was sumptuous. And I couldn’t get it out of my head.

A few weeks ago l got the ingredients to try to recreate it. I cheerfully exclaimed to Matt what I was doing…what I was about to undertake…what potential greatness awaited us and he looked at me with a blank stare.

“What crab dip? We got crab dip at Flying Squirrel? Okay…I guess I don’t remember it.”

I was flabbergasted…how could you forget this? But alas…he had. And despite my beseeching requests that he try to remember as I described it in painstaking detail, he did not. Perhaps it is better that way. He can remember major life events, history, politics, and birthdays and I can remember our meals.

My rendition was nearly as good and a perfect appetizer when paired with Grilled Braided Bread Sticks and Champagne. It makes a big batch so I actually split it between two dishes and served it two nights in a row at two different parties, each time greeted with great acclaim. If you don’t have time to do the bread sticks you could skip them and just do toasted french bread instead, but they are a lovely complement.

Dungeness Crab Dip
Adapted from Food & Wine
Makes two large appetizer dishes, enough for 12 easily

Unforgettable Dungeness Crab Dip

1 tablespoon unsalted butter
1 large shallot, minced
1 tablespoon dry vermouth
3/4 cup cream cheese (6 ounces), softened
1 cup Beechers Flagship Cheddar (or something equally sharp and delicious)
1/4 cup sour cream
1/4 cup mayonnaise
2 tablespoons Dijon mustard
3 tablespoons minced chives
2 teaspoons finely chopped tarragon
Salt and pepper
Dash of Tabasco
1 1/2 pounds jumbo lump crabmeat, picked over to remove any bits of shell

  1. In a medium skillet, melt 1 tablespoon of the butter. Add the shallot and cook over moderate heat until just beginning to brown, 4 minutes. Add the vermouth and cook until nearly evaporated, about 1 minute. Remove from the heat and stir in the cream cheese, cheddar cheese, sour cream, mayonnaise, mustard, chives and tarragon. Season lightly with salt and pepper, and a dash of Tabasco, and scrape into a large bowl. Fold in the crabmeat, maintaining the large pieces of meat. Spread the crab dip in a shallow baking dish, two dishes, or 12 shallow ramekins pending how you want to serve it.
  2. Preheat the broiler. Position a rack 10 inches from the heat. Broil until the dip is heated through and the topping is golden, about 2 minutes; shift the baking dish for even browning. Serve warm with Grilled Braided Bread Sticks.

Make Ahead The recipe can be prepared through Step 1 and refrigerated overnight. Return to room temperature before broiling.

Grilled Braided Bread Sticks

1 loaf store-bought pizza dough, I use Trader Joes
Flour
Olive Oil

  1. Remove bread from refrigerator and allow to rest lightly floured surface for 30 minutes.
  2. Slightly press out the dough, until it’s an 8″ circle.
  3. Divide into nine even sections.
  4. Using your hands, and gravity, allow each piece to stretch out until it is about 12″ long and 1.5″ side.

    Pizza dough, ready for braiding.

  5. On a floured surface take three pieces, press the tops together, and then braid until the end. Press ends together.
  6. Transfer to a cookie sheet and brush each side with olive oil.
  7. Get grill as hot as possible and allow to heat for another 10 minutes, scraping off the grates and carefully rubbing with olive oil on a paper towel.
  8. Reducing heat to 3/4, add the bread sticks to the grill, and cook until lightly browned and puffy, about 3-5 minutes per side, pending on the heat of your grill. Watch carefully to make sure they don’t burn.
  9. If you like, once done feel free to top with grated parmesan, or red pepper flakes, or roasted garlic, or whatever suits you.

14 Comments

Filed under Comfort Foods, Entertaining, Make ahead, Seafood, Uncategorized

Rainy Monday: Roasted Cauliflower, White Bean, and Cheddar Soup

These beans give soups a wonderfully creamy consistency without the guilt.

If you live in Seattle right now you are likely cursing the rain. For it has returned. In droves. Or sheets. Or buckets. Pick your poison.

Admittedly the past two weeks have been abnormally spectacular with gorgeous day, after gorgeous day, taunting and teasing us with the idea that perhaps this year the Seattle Summer Curse of not beginning until after the 4th of July would be broken. Well friends, as I sit here typing and the rain sits outside pounding, I’d say we might have spoken too soon.

While I’m going to grumble like a good Seattle-ite, I should also confess that there’s something fun and cozy about the rain returning. It’s an excuse for a few more winter meals and big red wines. And sweatshirts. Big sweatshirts.

This soup is a piece of cake to make, very healthy, and just so damn good. Roasting the cauliflower gives it an even richer flavor, and the white beans add a creaminess you would swear was the result of gallons of half and half. It’s quick to make, healthy to eat, and when served with a crusty piece of bread and mixed greens the perfect Rainy Monday Meal.

Roasted Cauliflower, White Bean, and Cheddar Soup
Serves 5+
Adapted from Closet Cooking

Roasted Cauliflower, White Bean, and Cheddar Soup

1 small head cauliflower, cut into florets
3 tablespoons olive oil
salt and pepper to taste
1 medium onion, diced
2 cloves garlic, chopped
1 tablespoon fresh thyme, chopped
3 cups chicken or vegetable broth
1 can cannellini beans or white beans, rinsed
1 1/2 cups aged white cheddar, shredded
1 cup milk
salt and pepper to taste

Directions
  1. Preheat oven to 400 degrees.
  2. Toss the cauliflower florets in two TB of oil along with the salt and pepper and arrange them in a single layer on a large baking sheet.
  3. Roast the cauliflower oven until lightly golden brown, about 20-30 minutes.

    Roasting the cauliflower, which really brings out the flavor.

  4. Heat the remaining oil in a large sauce pan over medium heat.
  5. Add the onion and saute until tender, about 5-7 minutes.
  6. Add the garlic and thyme and saute until fragrant, about a minute.
  7. Add the broth, cannellini beans, and cauliflower, bring to a boil, reduce the heat and simmer, covered, for 20 minutes.
  8. Puree the soup until it reaches your desired consistency with a stick blender.
  9. Mix in the cheese, let it melt and season with salt and pepper.
  10. Mix in the milk and remove from heat.

4 Comments

Filed under Cheap Eats, Comfort Foods, Health Conscious, Make ahead, Vegetarian

I’ve Missed You: Crab Cake Eggs Benedict

Crab Cake Eggs Benedict with Roasted Tomatoes

Crab Cake Eggs Benedict with Roasted Tomatoes

Hello, there. I’ve missed you! April came, I blinked, and now it’s gone. While in Shut Up & Cook land I have nothing to show for the past thirty days, in my “real life” I’ve had a month bursting at the seams with:

  • House guests
  • Foster puppies
  • Delicious dinners
  • Too much wine
  • Lots and lots of laundry

If you have a heart and a soul, which you must since you’re reading this blog, I imagine you’re most curious about the foster puppies…because let’s be honest…who wouldn’t be. Yes, in a moment of sheer genius I decided that a month with 20 days of house guests was really lacking something…a certain je ne sais quoi. That something quickly became not one foster puppy, but two. Crazy? Yes. Worth every minute of insanity? Absolutely.

Sweet Kaya, pulled just hours before being euthanized or "red lined".

Amazing what a good night sleep can do for a pup.

Our two little foster puppies, Kaya and Deacon (formerly Kyan and Raisin), came from the Clayton County Animal Shelter in Georgia, a rescue that due to extreme crowding and over population has one of the highest kill rates in the country; literally thousands of dogs are put down there each year. The group I’m partnering with, Georgia Peaches, works to bring puppies out and place them into Seattle homes where they are loved and flourish. Both these puppies got placed within a week into utterly enviable homes and have literally transformed in front of our eyes, turning from scared, sick, malnourished little creatures into thriving, happy, squeezably cute, puppies.

Doesn't this just melt your heart?

Deacon, living the good life on his first night here.

When not standing in the back yard and cheerfully willing the puppies to “Go pee. Go pee. Go pee.”, there has also been quite a bit of cooking, made oh so much better for the visit of some college friends, one of whom is a tremendous chef and food stylist. Chelsey quickly put me to shame in the kitchen, and I was positively giddy at being relegated to sous chef/dishwasher. She is a delight to watch, creating delicious meals that are seemingly effortless, utterly intuitive, and absolutely satisfying.

Saturday morning she decided to whip up some Crab Cake Eggs Benedict for myself, Matt, Julia, and Kate (because be honest…who doesn’t just whip that up?).

It was….to die for. Decadent. Over the top. Amazing. It also helped me conquer my fear of making Hollandaise sauce (although if I’m being honest I did have a brief moment of panic when it didn’t emulsify correctly at first).   Make this on a Saturday morning when life is bursting with activity, and nothing sounds better than slowing down and indulging.

Crab Cake Eggs Benedict
Serves 4

The start of all good things: eggs.

  1. Place on warmed plates 4 English Muffins, split, toasted, and buttered
  2. Arrange still warm crab cakes on the muffins , recipe follows
  3. Top each muffin with one poached egg, recipe follows
  4. Coat with 1/4 cup Hollandaise Sauce, recipe follows

Crab Cakes

A good crab cake should be decidedly crabby in my opinion. I’m not a fan of adding vegetables, such as red peppers or scallions, though you’re certainly welcome to and people to. I prefer to keep it simple.

  • 1 lb lump crabmeat
  • 1 Egg lightly beaten
  • 1/4 cup mayonnaise
  • 1 TB Dijon Mustard
  • Salt and Pepper
  • 1 cup Panko Breadcrumbs
  • 2 TB butter, melted
  1. Combine the crab, egg, mayo, mustard, salt and pepper, and bread crumbs.
  2. Shape into 8 small cakes.
  3. Chill in refrigerator if you have the time, though not required
  4. In a non-stick pan, grill in melted butter until lightly browned, about 5 minutes.
  5. Put in oven to keep warm.

Crab Cakes About to Go Into the Oven to Stay Warm

Poached Eggs

  1. In a large saucepan, over medium heat, bring 2 to 3 inches of water nearly until boiling.
  2. Add 1 TB vinegar (any type, I used cider vinegar)
  3. Gently swirl the water, and while swirling crack each egg into a small cup and then gently slide into the simmering water. (you can probably do 2-4 eggs at a time, pending on the size of your pan)
  4. Cook until the whites are set and the centers are still soft.
  5. Remove with a large slotted spoon and set in second pot of warmed water to 150 degrees.
  6. Cover and let stand for 15 minutes, reheating to 150 degrees if necessary.
  7. Drain each egg with a slotted spoon and hold against a clean, dry dish towel to absorb as much water as possible.

Hollandaise Sauce

  1. Place in the top of a double broiler 3 large egg yolks and 1 1/2 TB cold water
  2. Off the heat, whisk the egg mixture until it becomes light and frothy.
  3. Place the top of the double broiler over, not in, barely simmering water and continue to whisk until eggs are thickened, 2 to 4 minutes, being careful not to let the eggs get too hot.

    Whisking the eggs for Hollandaise.

  4. Remove from heat and whisking constantly slowly add in 1/2 cup warm butter.
  5. Whisk is 1 – 3 tsp lemon juice, a dash of hot pepper, and salt and pepper to taste.

Note: The trick with making Hollandaise is the emulsion, or adding the butter to the egg, you must do it slowly and whisk like your life depends on it. If the sauce is too thick, whisk in a few drops of warm water. Sauce may be kept warm for up to 30 minutes on a very low simmer.

19 Comments

Filed under Breakfasts, Comfort Foods, Entertaining, Seafood, Uncategorized

Breakfast Brioche, Baked Eggs, Bubbles, and Bulldogs

Cutest little guy you ever did see.

Remember how I was making a case to bring  the Slumber Party back? Well I’m adding something else to that list: Brunch and Bubbles. A perfectly brilliant combination, brunch allows for so many of my favorite things (easy, make-ahead dishes; beautifully set tables; champagne before noon). Furthermore, in these wildly busy lives that we all seem to lead, where syncing up calendars can often result in not seeing dear friends for weeks, Sunday Brunch seems to be a secret pass, often unscheduled and just waiting for a mimosa to kick it off.

This past weekend’s brunch was even better than usual, because not only did we have Blueberry Mimosas, Savory Breakfast Brioches, and Baked Eggs…we had Bulldogs! Well, just one bulldog to be precise, and a pretty stinking cute one at that. Meet Madden Hardaway Fay.

Lest you think it’s not possible, let me assure you that he is even cuter in person…the kind of cute that makes your heart pop and damn your willpower not to get a second dog. The only thing cuter than a 12-week old bulldog puppy? A 12-week old bulldog puppy romping and rolling for all he’s worth with Mr. Duke. They played for hours, we ate and drank for hours, and everyone was oh-so-pleased.

Those Cinnamon Pecan Sticky Buns were pretty out of this world, but since Matt is vehemently opposed to almost all things sweet, I decided to try a savory variety. And let me just say…we may have a problem here. They were delicious (damn them), and a perfect brunch entrée since they can be made completely ahead and then just popped into the oven the morning of. Serve them with Baked Eggs and Bubbles, and raise a toast to bringing brunch back.

Savory Breakfast Brioche with Prosciutto, Pesto, Feta, and Artichokes

Savory Breakfast Brioche, with Prosciutto, Pesto, Artichoke Hearts, and Feta

Serves 8

Dough:

  • 1/4 cup warm water (105° to 115°, you can use a meat thermometer to check)
  • 1 (1/4-ounce) package active dry yeast
  • 1/3 cup sugar
  • 3/4 cup milk
  • 4 Tbsp. unsalted butter, softened and chopped into about 16 small pieces, plus more for greasing
  • 3 large egg yolks
  • 1 1/4 teaspoon. salt
  • 4 to 4 1/4 cups all-purpose flour, plus more for dusting

Filling:

  • 1/4 lb prosciutto, thinly sliced
  • 3/4 cup pesto
  • 1 can artichoke hearts, drained and coarsely chopped
  • 3/4 cup feta (you could sub another cheese if you liked)

How-To

  1. Make the dough.  In the bowl of an electric mixer, combine warm water, yeast and 1 tsp. sugar. Stir to dissolve and let sit until foamy, about 7 – 10 minutes. You want to see some little air bubbles.
  2. Add milk, butter, remaining sugar, egg yolks, salt and 3 cups flour.  Mix on low speed until blended. Switch to a dough hook and then, again on low speed, slowly incorporate the remaining 1 cup of flour. Increase speed to medium, kneading dough until smooth and slightly sticky (adding a little more flour if too wet), 3 to 5 minutes. Shape the dough into a ball and place in a large, buttered bowl. Turn dough over in bowl to coat with the butter from the bowl.  Cover the bowl with plastic wrap. Let rise in a warm place until doubled in volume, about 1 hour (or 2 hours if not in an entirely warm place). After the dough has risen, punch down. Turn out onto a lightly floured cutting board and let sit 20 minutes.
  3. Roll dough out into a 12″ x 18″ rectangle. Top with the pesto, prosciutto, feta, and artichoke hearts. Starting with the long side, roll dough into a cylinder. Place seam side down on a flat surface and cut crosswise into 15 slices.

    Adding the filling.

  4. Place dough slices, flat side down. Space out so that they roughly fill the whole pan while still slightly touching in places. Cover with plastic wrap, leaving room for the buns to rise, and refrigerate overnight.

    Ready to rise.

  5. Remove the rolls from the refrigerator an hour before you want to make and let come to room temperature. Meanwhile, preheat oven to 375°. Bake buns on the middle rack until golden, 28 – 32 minutes.

1 Comment

Filed under Breakfasts, Comfort Foods, Entertaining, Make ahead, Uncategorized

Won’t You Please?: Slow Cooked Short Ribs atop a tower of Watercress, Polenta, and Ragu

Hi there,

Could I ask you to do me a favor? What if I say please? I’ll trade you a yummy, delicious recipe in exchange?

Nominations are now open for Saveur’s 2012 Best Food Blog Awards and I would be so thrilled to see Shut Up & Cook make the list. It’s admittedly stiff competition with winner’s from last year such as SmittenKitchen, 101 Cookbooks, and my personal fave, Orangette, but I think we’ve created something pretty special here and I’ve love to have your help going for it.

How cool would this be?!?

Right now they are simply accepting nominations so all that’s required is 5 easy steps:

  1. A visit to their nominations page.
  2. Entering this url: http://www.shutupandcook.wordpress.com
  3. Selecting which three categories you think best fit (perhaps Best Cooking Blog, Best Piece Of Culinary Writing, and Best Food Humor Blog?)
  4. A short reason why you’re nominating this blog.
  5. Your name, email, and three little clicks to “opt out” of their promotional offers.

Would you please? I would be so grateful.

And with that…let’s get back to the food. And not just any food mind you…a tower of deliciousness. That’s right…a tower. This past weekend was perfect. Productive enough to feel self-righteous and relaxed enough to actually re-charge.  The whispers of Spring are in the air and with that came a funny longing for a few more winter meals, served by a roaring fire with a great bottle of wine.

Nothing to me says winter deliciousness like a slow roasted meat in a red sauce, so I set out to see what I could come up with. And I have to say…this was AMAZING!  It’s one of those meals where each of the individual parts is good…but put them all together…and wow. You’ve got something great. Since you make this largely in the slow cooker it’s perfect for a Sunday when you’re wanting  to be out and about, yet come home to a truly indulgent meal.

Slow Cooked Short Ribs served atop a Tower of Watercress, Griddled Polenta Cakes, and Sausage Ragu

Short Rib Tower!

Serves 8

Short Ribs and Ragu:
2 TB Olive Oil
8 bone-in short ribs, patted dry, and sprinkled with salt and pepper (about 2 lbs)
1 lb loose italian sausage (best you can find)
1 cup celery, finely diced
1 cup carrots, finely diced
1 medium onion, finely diced
3 cloves garlic, finely diced
2, 28 oz cans of Whole San Marzano Tomatoes, slightly smashed with a masher or food mill
1 cup of dry white wine

Polenta:
2 cups milk
2 cups water
1 tsp salt
1 cup cornmeal/polenta
2 TB vegetable oil

Garnishes
1 bunch watercress washed and dried, stems removed
1 cup finely grated fresh parmesan

  1. In a large slow cooker add the cans of tomatoes and white wine. Put on high and begin to allow to warm up.
  2. In a large, high-edged skillet add the olive oil and, working in batches if necessary, brown the short ribs over relatively high heat until golden on all sides, or about 8 minutes. Transfer to slow cooker.
  3. In the same pan add the sausage, and cook on medium, stirring to break up, until beginning to brown. Add the celery, onion, carrots, and garlic and saute until vegetables are  beginning to get tender and omit that oh-so-good smell. About 5 minutes. Add all into the slow cooker and cook on low for 8 hours, or high for 4-6 hours until short ribs are falling off the bone and fork tender.

    Love all the different colors.

  4. Remove the short ribs from the slow cooker and transfer all the ragu to a large pot. Increase the heat to medium, and reduce until thickened to a true ragu (almost goopy), about 1 1/2 hours, stirring occasionally to prevent sticking. Add the short ribs back in until heated through.

While the meat is slow cooking make the polenta:

  1. Bring the water, milk, and salt to a boil in a medium saucepan.  Slowly whisk in the cornmeal/polenta, and stir constantly until thickened and smooth, about 5 minutes. Spread into a 9×9 glass baking dish and put in the refrigerator to cool and set, at least 30 minutes.

Assembling the TOWER! (isn’t that just fun to say?)

Assembling the goodness..do it quick so everything stays hot!

  1. Remove the polenta from the fridge and using a glass, cut circles out of the firm polenta. Add the remaining oil to a non-stick pan and over medium heat grill until golden brown on each side, about 6 minutes.
  2. Meanwhile, evenly divide the watercress among the plates in a small circle.
  3. When ready put the grilled polenta cakes on the watercress, add about a 1/4 cup of the thickened ragu, top with one short rib, and generously top with grated parmesan.
  4. Prepare to fall in love.

10 Comments

Filed under Comfort Foods, Entertaining, Make ahead, Seasonal Cooking, Uncategorized

Give The People What They Want: Fish Tacos Take Two

Baja Fish Tacos with White Sauce

Do you want to know what the number two most frequent search term that gets people to Shut Up & Cook is? I’ll give you a few guesses. Tragically it is not “witty, smart, brilliant, and good looking home cooks”. Nor is it “the next Rachael Ray”. And while I’m sure it’s bound to happen at some point, I have yet to see Google searches for “next food blogger who is going to make it big” top the list.

Nope, it is none of these things. Instead it is:

  • white sauce for fish tacos

And do you want to know what # 3 is?!?

  • fish taco white sauce

How not sexy is that? Alas, I’ve had to come to the reality that what people really want…what they truly desire is fish tacos. And how can you blame them? They are amazing.

Back in November of 2009 (hard to believe that was 2+ years ago) I did a post about Shockingly Good Baja Fish Tacos. Since then I have eaten many more fish tacos (some good, some great, some bad), but I hadn’t made them again until this past weekend when overcome by a craving I couldn’t ignore, I simply had to have them. And to prove to my Mom that fish tacos could be delicious (“Honey…I have to say…I just don’t get it….fish tacos? Really?”)

They were just as good as last time, if not even better thanks to the delightful company of our friend’s CJ, Nadia, and Harrison and the amusing conversation that ranged from politics, to commerce, travel, to relationships, and a very entertaining, wine-coming-out-my-nose, attempt to explain to my mother what the term “punks” meant. Needless to say CJ’s attempt at providing a Sid Vicious reference did nothing.

These are a little messy to make, and yes your house will be a little smelly for a few hours, but you should do it. Because hey…if nothing else, fish tacos make an excellent white sauce delivery system.

Baja Fish Tacos 

Step 1 – White Sauce:

  • Fresh lime juice to taste (I like about 2 TB)
  • ½ cup sour cream
  • ½ mayonnaise
  • 1 TB Sriracha hot sauce (or something similar)
  • ½ teaspoon – crushed oregano
  • ½ teaspoon – ground cumin
  • ½ teaspoon – dried, crushed dill
  • ½ teaspoon – ground cayenne chile
  • ground white pepper to taste

 Combine the first three ingredients, aiming for a slightly runny consistency. Add the rest of the ingredients and mix.

The making of the coveted white sauce.

Step 2 – Toppings Bar:

So pretty.

  • 1/2 bundle cilantro
  • 2 cups red cabbage
  • 1 cup queso fresco
  • 2 limes

Coarsely chop cilantro and set aside in small bowl for toppings. Dice queso fresco and set aside in separate bowl. Cut up the cabbage. Slice as thinly as possible so the strands still stay together. Set aside in bowl. Quarter the limes and serve one wedge with each plate and extras in a bowl.

Toppings Bar (which I personally try to incorporate into as many meals as possible).

Step 3 – The Fish:

Cod works well, although you can use whatever white fish you prefer. Since it’s going to be battered and fried this is a great opportunity to take advantage of whatever is on sale.

2 LB White Fish washed, patted dry, and cut into 1 inch strips

Batter:

  • 1 cup flour
  • 2 teaspoons salt
  • 1/2 can beer, not dark

Combine flour and salt, then add beer. It should be relatively thick, which was nice since the batter actually stayed on the fish when we fried it.

Fill large saucepan with vegetable oil or lard. You want enough that the fish can be submerged in it. Get it nice and hot and cook the fish in batches, being certain not to crowd the pan as you want the oil to stay hot.

Turn the fish after about a minute. Look for the color to decide when to remove. As soon as it’s golden, you’re good to go. Remove and place on a plate with a paper towel to drain.

Serve immediately with tortillas, white sauce, and toppings. Enjoy.

8 Comments

Filed under Cheap Eats, Comfort Foods, Entertaining, Seafood, Uncategorized